


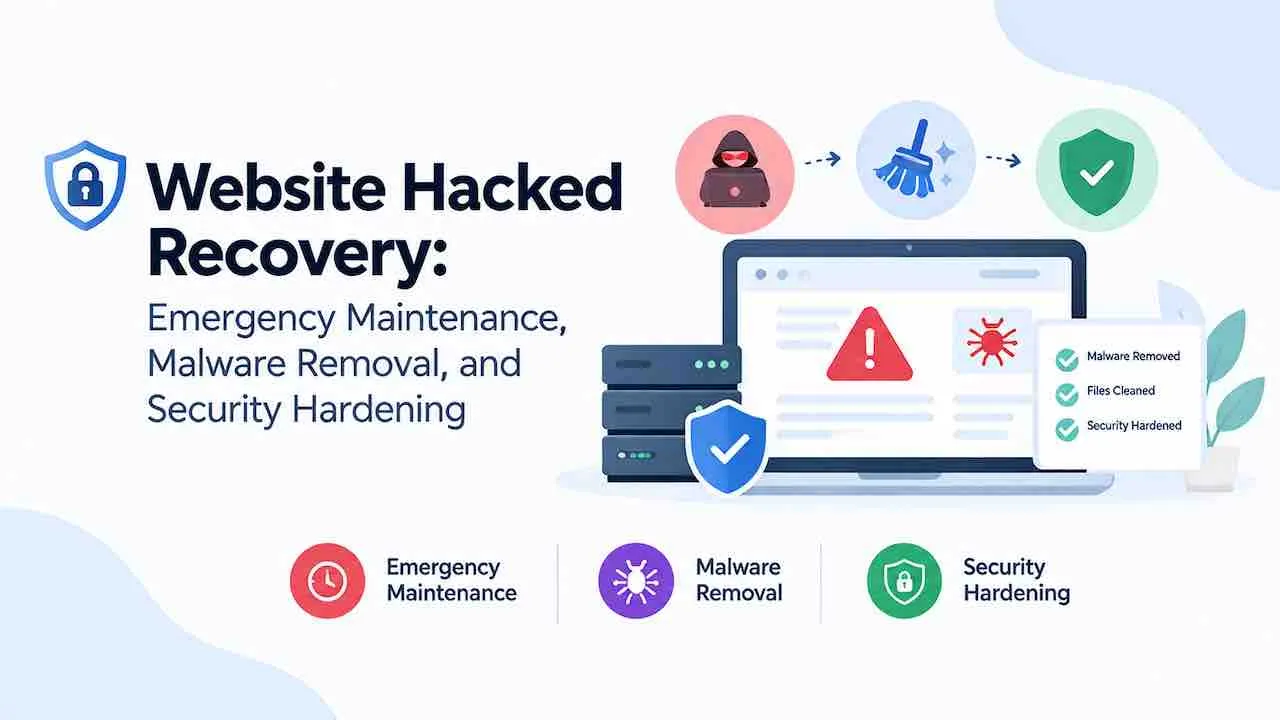
Website hacked recovery startswith three steps. Take the site offline, scan every file for malware, and change all passwords. A hacked site spreads malware to visitors within minutes. Google blacklists compromised sites and hosting providers suspend accounts within hours. This guide covers emergency malware removal, backdoor cleanup, blacklist removal, and security hardening.
Recovery is possible at every stage, even after hosting suspension or Google blacklisting. If your site is under active attack right now, start with the immediate actions section below.
Signs Your Website Has Been Hacked
Most website hacks stay hidden for days or weeks before detection. Attackers conceal malware to preserve access. These signals confirm a site has been compromised.
- Google warning in search results: Google shows a security warning below your listing in search results. It reads “This site may harm your computer” or “Deceptive site ahead”.
- Visitors redirected to spam: Visitors land on gambling, pharmaceutical, or adult pages instead of your content.
- Hosting account suspended: Your hosting provider sent an abuse notice and suspended your account.
- Google Search Console security alert: The Security Issues report shows malware, deceptive pages, or harmful downloads.
- Admin panel blocked: Your CMS admin login fails without any recent password change on your end.
- Unknown admin accounts: New user accounts appear in your CMS without any action from your team.
- SEO spam in Google results: Google shows Japanese keywords, pharmaceutical terms, or casino text for your pages.
- Unknown files in directories: Files with random names appear in wp-content/uploads or the root directory.
- Modified core files: Core CMS files show recent timestamps your team did not create.
- Outbound spam spike: Your domain starts sending spam and email deliverability drops without explanation.
- Antivirus alerts from visitors: Customers report their antivirus blocking your URL.
Immediate Actions in the First 30 Minutes
Every minute a hacked site stays live, it spreads malware to visitors. Follow these actions in order before touching any files.
- Take the site offline. Use your hosting control panel to activate maintenance mode with an HTTP 503 response. A 503 tells Google the downtime is temporary and protects your rankings. A 200 response on a maintenance page causes Google to index it as live content.
- Change all credentials now. Change hosting panel, FTP, database, and all CMS admin passwords. Do this before cleanup starts.
- Contact your hosting provider. Your host can run server level scans, identify entry points, and assist with cleanup.
- Open Google Search Console. Go to Security and Manual Actions, then Security Issues. This shows which pages Google flagged and why.
- Back up the hacked site. Even a compromised backup preserves your content structure. Take one before any cleanup removes files.
- Document everything you find. Screenshot error messages, unknown files, and host notices. This reveals the attack vector during investigation.
- Revoke all active sessions. Force log out all users from your CMS. Remove unknown connected apps and API tokens.
Types of Website Hacks and Their Symptoms
Identifying the hack type before cleanup saves hours of guesswork. Match your symptoms to this table to find the right recovery path.
| Hack Type | Primary Symptom | Where to Look |
|---|---|---|
| Malicious redirect | Visitors sent to spam, gambling, or adult sites | .htaccess file, index.php, functions.php |
| SEO spam injection | Japanese, pharmaceutical, or casino keywords in Google results | Database posts table, header files, footer files |
| Backdoor installation | No visible symptoms; site reinfects after cleanup | wp-content/uploads, theme files, eval/base64 code |
| Admin account takeover | Cannot log in; unknown admin accounts present | CMS user table, login logs |
| Database spam injection | Spam links inside post content and comments | Database posts and options tables |
| Defacement | Homepage replaced with attacker message | index.php, index.html in root directory |
| Phishing page | Google warns deceptive site; customers report fake login pages | Uploaded HTML files, hidden subdirectories |
| File upload exploit | PHP files found inside the uploads folder | wp-content/uploads for .php or .exe files |
Step by Step Website Hacked Recovery Process
Website hacked recovery follows eight steps in a fixed order. Skipping steps or changing the order causes reinfection. Complete each step fully before moving to the next.
Step 1: Scan All Files for Malware
A malware scan identifies every infected file before manual cleanup begins. Use at least two tools for cross verification. One scanner alone may miss obfuscated code.
- Sucuri SiteCheck: Free external scanner that reviews files, blacklist status, and injected code from outside the server.
- Wordfence (WordPress): Scans every file against known clean versions and flags any modification.
- MalCare: Deep server side scan that finds obfuscated malware other tools miss.
- cPanel Virus Scanner: Available from most shared hosting panels for a server level file scan.
- ImunifyAV: Server level malware detection available on most managed hosting accounts.
Save the full scan report. It lists every infected file path. Work from this list during manual cleanup.
Find recently modified files from your server terminal. Run this command to see every file changed in the last 7 days:
find ./ -type f -mtime -7 -not -path "./wp-content/uploads/*"
Files modified during the hack appear in this output. Any unknown modification is a potential infection point. Extend to -mtime -21 if the hack date is unknown.
Step 2: Remove Malicious Files and Injected Code
Malicious code hides in theme files, plugin files, core files, and the uploads folder. Inspect these locations from the scan report.
- .htaccess file: Open it and look for code that redirects visitors to external domains. A clean WordPress .htaccess has fewer than 20 lines.
- Core CMS files: Download a fresh copy of WordPress from wordpress.org. Compare your core files against it. Replace any modified core file with the clean version.
- Theme files: Search header.php, footer.php, and functions.php for
<script>tags, eval() calls, or base64 strings. Remove any your team did not add. - Plugin files: Remove any plugin you do not recognise. Reinstall every plugin from its official source rather than keeping modified copies. Delete any nulled or pirated plugins immediately. Nulled plugins almost always contain malware installed by their distributor.
- Uploads folder: The wp-content/uploads directory should contain only images and documents. Delete any .php, .exe, or .js files found there.
Obfuscated malware patterns to search for in all files:
eval(base64_decode(gzinflate(str_rot13(preg_replace("/.*/e",FilesManorWSO(web shell indicators)- Large blocks of encoded characters with no readable logic around them
Use your hosting file manager’s search function to scan all files for these strings. Remove every line containing them.
Step 3: Clean the Database
Attackers inject spam links, malicious JavaScript, and hidden redirects directly into the database. A file scan alone misses these injections. Inspect the database separately.
- Open phpMyAdmin from your hosting control panel.
- Search the wp_posts table for
<script,base64,eval, or spam domain strings in post content. - Search the wp_options table for suspicious values in the
siteurlorhomefields. Attackers change these to redirect all traffic to their domain. - Search the wp_users table for unknown admin accounts. Delete any account your team did not create.
- Search the wp_usermeta table for elevated roles assigned to unknown users.
- Inspect scheduled tasks. Run this query to expose malicious cron jobs:
SELECT * FROM wp_options WHERE option_name = '_transient_doing_cron';Also search the wp_options table for any option containing a URL in its value inside serialized data. Attackers use scheduled tasks to pull backdoors on a timer. Skipping this step causes persistent reinfection.
A full database backup before this step is mandatory. Database edits in phpMyAdmin cannot be undone without a backup.
Step 4: Remove All Backdoors
Backdoors are hidden files or code that give attackers access again after cleanup. Missing even one backdoor means the site gets hacked again within days.
- Search all files for
FilesMan,WSO,r57shell, orc99shell. These are known web shell identifiers. - Delete all PHP files found in the uploads directory. PHP files have no legitimate reason to exist in wp-content/uploads.
- Look for files with names that mimic core files, such as
wp-includes/class-wp-local.php. That file is not a real WordPress file. - Search for
$_POST['cmd'],$_REQUEST['action'], orsystem(in any file. These are command execution indicators. - Run
ls -lain your server terminal to reveal hidden directories with dot prefixes in your root. - Inspect wp-content/mu-plugins. MU plugins (must use) load automatically on every page request. They are not visible in the WordPress Plugins screen. Attackers plant backdoors here because standard plugin scans often miss this directory. Delete any file in mu-plugins your team did not intentionally place there.
Step 5: Reinstall Core Files
Replace all core CMS files with fresh downloads from the official source. This removes infected core files the scanner may have missed.
- WordPress: Download the latest version from wordpress.org. Delete your current wp-admin and wp-includes folders. Upload fresh copies from the download package.
- Do not delete wp-config.php. This file stores your database credentials. Replacing it breaks your database connection.
- Do not delete wp-content. Your themes and plugins are inside this folder. Clean it manually rather than replacing it.
- Reinstall every active plugin from its official WordPress.org page or developer portal.
- Reinstall your active theme from its original source. Do not reuse the potentially infected version.
- Verify core file integrity with WP-CLI. Run
wp core verify-checksumsafter reinstalling. This command compares every core file against WordPress.org’s official checksums. It flags any file that does not match.
Step 6: Restore From a Clean Backup
A backup from before the hack is the fastest and cleanest recovery path. Restoring it removes all malicious code in one step.
- Find the hack date from your server access logs or Google Search Console security alert timestamps.
- Select a backup created before that date.
- Restore files first if possible. A full database restore overwrites all content created after the backup date.
- After restoring, run a fresh malware scan on the restored files. Attackers sometimes plant code before triggering visible alerts.
Restore decision warning: A full restore removes all data created after the backup date. If new orders or signups arrived since the backup, restore only the infected database tables instead.
A structured website backup strategy with daily automated snapshots is the most valuable hack recovery preparation. Set it up before any update cycle runs.
Step 7: Reset File Permissions
Reset all file permissions after cleanup to block future unauthorised writes.
- Set all folders to 755 (owner read, write, execute; others read and execute only).
- Set all files to 644 (owner read and write; others read only).
- Set wp-config.php to 600 (owner read and write only; no access for others).
- Apply permissions across all directories at once using your FTP client or a terminal chmod command.
Step 8: Change All Credentials a Second Time
Change every password again after cleanup is complete. Attackers often install keyloggers before detection. Credentials entered during cleanup may already be recorded.
- New hosting panel password
- New database password (update wp-config.php to match)
- New WordPress admin password for every admin account
- New FTP account passwords
- New SSH keys if SSH access is used
- Regenerated WordPress secret keys and salts via the WordPress secret key API
Scan the computer you used to access the site. If a keylogger infected your device, new passwords get recorded the moment you type them. Scan every device used for hosting panel access, FTP, or CMS admin. Do this before logging in to verify your cleanup.
WordPress Hacked Recovery: Platform Specific Steps
WordPress sites face specific vulnerabilities that require additional steps beyond the general process. Apply these after the main cleanup is complete.
Remove Unknown Admin Accounts
Attackers create hidden admin accounts to maintain access even after passwords change. Go to Users and then All Users in your WordPress admin. Delete any account your team did not create. If you cannot access the admin panel, run this SQL query in phpMyAdmin to find unknown admins:
SELECT * FROM wp_users INNER JOIN wp_usermeta ON wp_users.ID = wp_usermeta.user_id WHERE wp_usermeta.meta_key = 'wp_capabilities' AND wp_usermeta.meta_value LIKE '%administrator%';
Regenerate WordPress Security Keys
WordPress security keys invalidate all active login sessions instantly. Visit the WordPress secret key generator at https://api.wordpress.org/secret-key/1.1/salt/ to get a new set. Replace the existing keys in wp-config.php. This forces every active user, including any attacker holding a valid session, to log out immediately.
Inspect .htaccess for Malicious Code
The .htaccess file is a primary target for redirect hacks. Open the file in a text editor. A clean WordPress .htaccess contains only standard rewrite rules for permalink handling. Delete code containing external domain references, base64 strings, or conditional redirect logic by user agent. Replace the entire file with a clean default version if the injected code is extensive.
Scan wp-content/uploads for PHP Files
The uploads folder should never contain executable files. PHP files in wp-content/uploads are almost always backdoors or web shells. Run this command in your server terminal to find them:
find wp-content/uploads -name "*.php" -print
Delete every file this command returns. None of them are legitimate uploads.
How to Remove Your Site From Google’s Blacklist
Google blacklists hacked sites to protect searchers from malware and phishing pages. Blacklist removal requires full cleanup first, then a review request through Google Search Console.
Google uses two different warning labels with different review timelines. Identify which applies before you submit a review request:
- “This site may harm your computer” means Google detected active malware serving malicious downloads. Review requests typically resolve within 24 to 72 hours of a successful cleanup submission.
- “This site may be hacked” means Google detected SEO spam injection. Pharma hacks and Japanese keyword hacks trigger this label. The review takes several weeks. Google recrawls all affected pages before clearing it.
- Complete all cleanup steps first. Submitting a review before cleanup causes a failed review. The next review attempt then takes longer to process.
- Verify ownership in Google Search Console. If admin access was lost during the hack, use DNS verification or the HTML file method.
- Open the Security Issues report. Go to Security and Manual Actions, then Security Issues. Review every flagged URL listed in the report.
- Request a review. Click Request Review inside the Security Issues report. Describe every step you took to clean the site. Google reviews typically complete within 1 to 3 days.
- Submit a reconsideration request if needed. If the hack triggered a manual action, submit a reconsideration request from Manual Actions.
Verify blacklist status outside Search Console: Visit Google’s transparency report at https://transparencyreport.google.com/safe-browsing/search and search your domain. This shows the current Safe Browsing status before submitting any review request.
Google is not the only blacklist. A site cleared by Google may still trigger warnings through Norton Safe Web and McAfee SiteAdvisor. After Google clears your site, submit removal requests at safeweb.norton.com and siteadvisor.mcafee.com. This restores clean status across all major browser security filters.
Fix a Hosting Account Suspension After a Hack
Hosting providers suspend accounts when malware, spam, or phishing content is detected on the server. Suspension recovery requires direct communication with your hosting support team.
- Read the suspension notice carefully. The notice names the exact files or behaviours that triggered suspension. This identifies the entry point.
- Request temporary access for cleanup. Most hosts provide read only FTP or file manager access to suspended accounts. Use this to download a backup and begin cleanup.
- Complete the full cleanup process. Hosts verify cleanliness before restoring access. Partial cleanups lead to continued suspension.
- Submit a cleanup confirmation to your host. Send a detailed list of removed files, changed passwords, and steps taken. Include your malware scan results as evidence.
- Request account reinstatement. Most hosts restore accounts within 24 to 48 hours after verifying the cleanup report.
Security Hardening After Website Hacked Recovery
Recovery without hardening leads to reinfection within days. Attackers scan previously compromised servers and return to unprotected sites. These hardening steps block the most common paths attackers use to return.
Install a Web Application Firewall
A Web Application Firewall blocks malicious requests before they reach your site. It stops SQL injection, cross site scripting, and brute force attacks at the network level. Three options cover most sites:
- Cloudflare WAF: DNS level protection that works for any CMS or custom site. Free plan available with immediate activation.
- Sucuri Firewall: Purpose built for website protection. Includes malware scanning and blacklist monitoring in one service.
- Wordfence (WordPress): Plugin level firewall with a real time threat intelligence feed for WordPress sites.
Enable Two Factor Authentication
Two factor authentication stops credential stuffing attacks even when passwords are compromised. Install a two factor authentication plugin for WordPress or enable it from your hosting control panel. Require it for every admin account on the site, not just the primary one.
Harden File Permissions
Strict file permissions limit what attackers can write to your server after gaining entry. After setting the 755 and 644 permission levels, apply these additional restrictions:
- Disable PHP execution in the uploads folder. Add
php_flag engine offto the .htaccess file inside wp-content/uploads. - Set wp-config.php to 400 on servers that support it. This makes the file completely read only.
- Block XML-RPC access if your site does not use it. Attackers abuse XML-RPC for brute force attacks and DDoS amplification.
Set Up Security Monitoring
Security monitoring detects the next intrusion attempt before it becomes a full breach. Set up these four monitoring layers after recovery:
- File integrity monitoring: Alerts you when any core file changes without an authorised update.
- Login attempt monitoring: Flags repeated failed logins from the same IP address and blocks them automatically.
- Uptime monitoring: Detects sudden downtime, which frequently signals an active attack in progress.
- Google Search Console email alerts: Alerts you the moment Google detects a new security issue on your domain.
Proactive website security maintenance combines all four monitoring layers with automated responses to common intrusion patterns. This removes the manual monitoring burden entirely.
Remove All Unused Plugins and Themes
Inactive plugins and themes with known vulnerabilities give attackers an entry point even when deactivated. Remove every plugin and theme your site does not actively use. An inactive plugin with a known SQL injection flaw is still exploitable. It remains at risk even when turned off in the dashboard.
Security Hardening Reference Checklist
| Hardening Step | Tool or Method | Priority |
|---|---|---|
| Web Application Firewall | Cloudflare, Sucuri, or Wordfence | Critical |
| Two factor authentication | Hosting panel or WP 2FA plugin | Critical |
| Regenerate WordPress security keys | WordPress secret key API | Critical |
| File permission reset (755 and 644) | FTP client or terminal chmod | Critical |
| Disable PHP in uploads folder | .htaccess php_flag engine off | High |
| Block XML-RPC access | .htaccess rule or Wordfence setting | High |
| File integrity monitoring | Wordfence, Sucuri, or iThemes Security | High |
| Login attempt limits | Wordfence, Loginizer, or hosting panel | High |
| Automated daily backups | UpdraftPlus, Jetpack, or host backup | High |
| Remove unused plugins and themes | WordPress Admin, Plugins section | Medium |
How Long Does Website Hacked Recovery Take?
Recovery time depends on the hack type, site size, and whether a clean backup exists.
| Scenario | Estimated Recovery Time |
|---|---|
| Simple defacement with a clean backup available | 1 to 3 hours |
| Malicious redirect with no backup and manual cleanup | 4 to 8 hours |
| SEO spam injection across hundreds of posts | 8 to 24 hours |
| Full server compromise with multiple backdoors | 1 to 3 days |
| Hosting suspension requiring host support | 24 to 72 additional hours |
| Google blacklist removal after successful cleanup | 1 to 3 days after review request |
DIY vs Professional Website Hacked Recovery
DIY recovery works for small sites with a recent clean backup and one known hack type. Professional recovery is the better path in these situations:
- The site reinfects within hours of manual cleanup. This signals an undetected backdoor.
- The hack involves a database injection across thousands of posts.
- The site distributed malware or hosted phishing pages, and legal notification obligations may apply.
- Your hosting provider found a server level compromise affecting multiple sites on the account.
- A Google Manual Action requires a formal reconsideration request with documented cleanup evidence.
- Customer data was stored on the site and may have been accessed or copied.
Our emergency website maintenance services include forensic file analysis, database cleanup, blacklist removal, and recovery monitoring. Professional recovery delivers results faster during an active breach.
How a Website Hack Affects SEO and Search Rankings
A compromised site suffers SEO damage the moment Google detects the breach. The impact is immediate and lasting.
Ranking recovery requires technical cleanup and a formal review request in sequence.
- Organic traffic stops: Google removes hacked pages from search results within hours of blacklisting. Traffic from organic search drops to near zero on affected pages.
- Brand search warning: Google shows a security warning below your domain in brand search results. This damages click through rates on your own brand name.
- Spam backlinks injected: SEO spam hacks plant thousands of outbound spam links across your site. These trigger Google’s link spam filters and reduce domain authority.
- Crawl budget wasted: Hundreds of spam pages created by the hack consume Googlebot crawl budget. Your real pages get crawled less often as a result.
- Structured data broken: Malicious code injected into page headers or schema markup removes rich results from Google Search.
- Sitemap contaminated: SEO spam hacks create thousands of spam URLs. These appear in your sitemap and waste Googlebot crawl budget on pages that should never exist.
Regenerate and resubmit your sitemap after cleanup. Delete the current sitemap. Generate a clean version without spam URLs. Resubmit it in Google Search Console under Sitemaps. Google can take up to 2 weeks to recrawl a large site. Resubmitting speeds up that process.
The technical SEO maintenance guide covers every audit step to restore rankings after a hack.
Malware Scanning and Recovery Tools
| Tool | Type | Best For |
|---|---|---|
| Sucuri SiteCheck | External scanner | Quick blacklist status and visible malware scan |
| Wordfence | WordPress plugin | Deep file scan and WAF for WordPress sites |
| MalCare | WordPress plugin | Obfuscated malware detection and one click cleanup |
| ImunifyAV | Server level | Full server scan across all sites on a hosting account |
| Google Safe Browsing | Blacklist scan | Verifying Google blacklist status before review request |
| VirusTotal | Multi engine scanner | Scanning individual suspect files against 70 plus antivirus engines |
| phpMyAdmin | Database tool | Manual database inspection and spam injection cleanup |
Frequently Asked Questions About Website Hacked Recovery
Take the site offline immediately, then change all passwords. Putting the site in maintenance mode stops visitors from receiving malware while you investigate. Change hosting, database, FTP, and CMS admin passwords before starting any cleanup. An attacker with valid credentials enters the site again the moment cleanup finishes.
Yes, a hacked website can be fully recovered in most cases. Success depends on hack type, response speed, and whether a clean backup exists. Sites without a recent backup can still be cleaned through manual file inspection and database cleanup. Google blacklist removal typically completes within 1 to 3 days of a successful cleanup submission.
Inspect Google Search Console Security Issues, scan with Sucuri SiteCheck, and review your server file timestamps. Visible signs include visitor redirects to spam sites, Google warnings in search results, and unknown admin accounts. Many hacks produce no visible symptoms initially. A regular malware scan catches hidden infections before they trigger blacklisting.
A site that reinfects after cleanup almost always has an undetected backdoor. Backdoors are hidden files that give attackers access without needing a password. They hide in the uploads folder, inside theme files, and in paths that mimic legitimate core files. A server level scan with ImunifyAV or MalCare finds backdoors that standard plugin scans miss.
A website hack causes immediate ranking drops and organic traffic loss. Google removes blacklisted pages from results within hours of detection. SEO spam hacks plant thousands of spam links that trigger link filters. Full ranking recovery after cleanup and blacklist removal takes 2 to 6 weeks. Duration depends on how long the hack stayed active.
Get Emergency Website Hacked Recovery Help
A hacked site is a business emergency. Quick Digital has managed website hacked recovery for businesses for over a decade. Every recovery includes forensic file analysis, database cleanup, blacklist removal, and a complete hardening plan.
Immediate response. Malware removed. Blacklist cleared. Site hardened.
The website security maintenance guide covers the protection system that stops the next attack.